
If you’re not Persian and you like food, chances are that you’ve at least heard of chelow kabob. And maybe you’ve even tried it (yeah! yeah!).
It is most definitely, and not so modestly, the national dish of Iran. One taste and you realize why there’s no room for modesty there.
Guys, this is no joke. It’s jam-packed flavor lovin’.
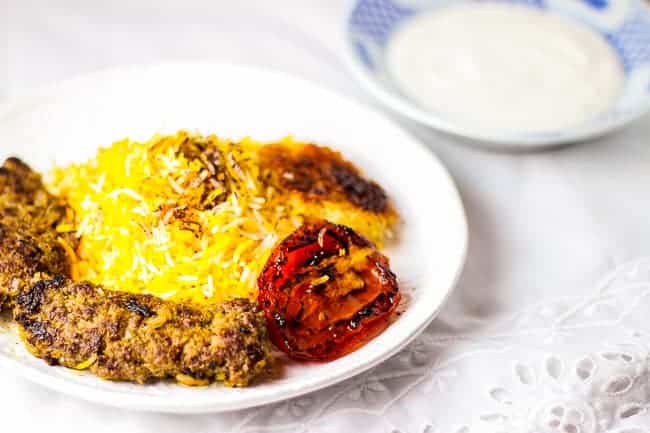
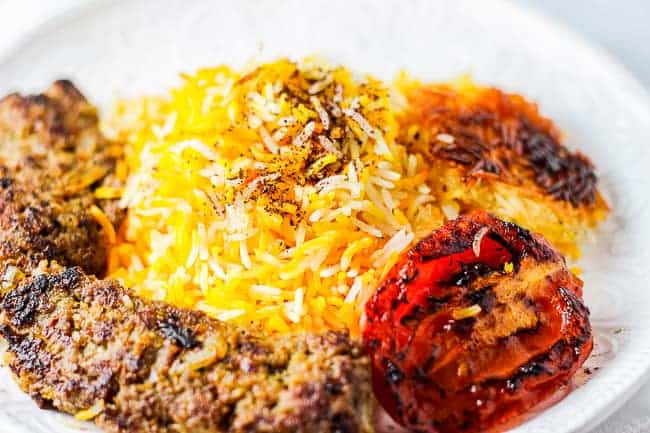
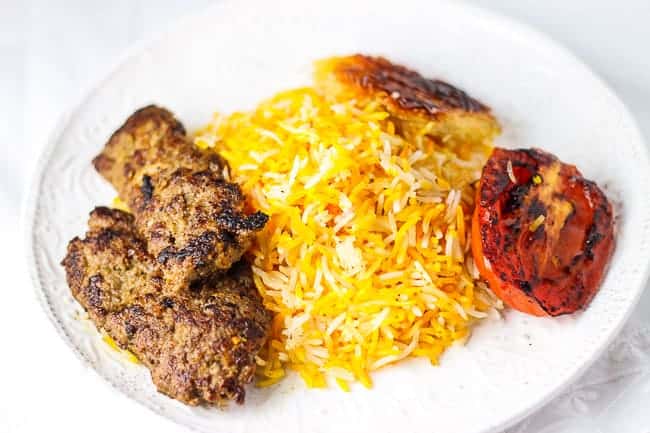
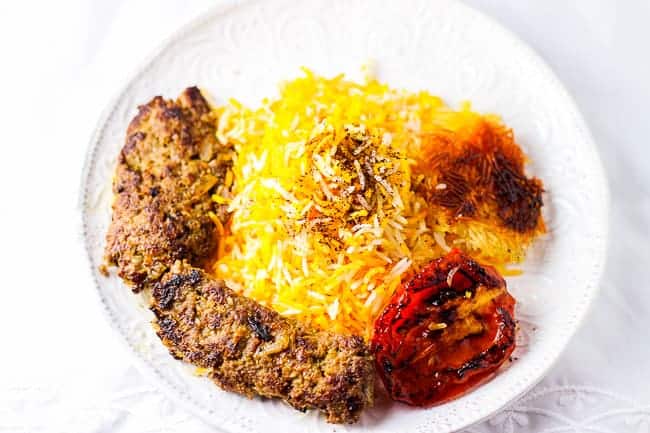
Because it’s not an everyday meal, if you happen to have it at a restaurant it’s presented on a platter (not just a puny plate) to each person at the table. At its very least, it’s a mound of fragrant Persian rice served alongside fire-grilled kabobs of beef or lamb or chicken or even fish.
There’s always fire-grilled ripe tomatoes that sort of get smashed into the rice as you’re eating. That’s if you do it correctly. For you folks that don’t do this, well get with it because there’s no budging on that.
There really is a correct way to eat chelow kabob. At least in my head there is. So before I get too excited about that, let me take a step back and do 2 seconds of translation here:
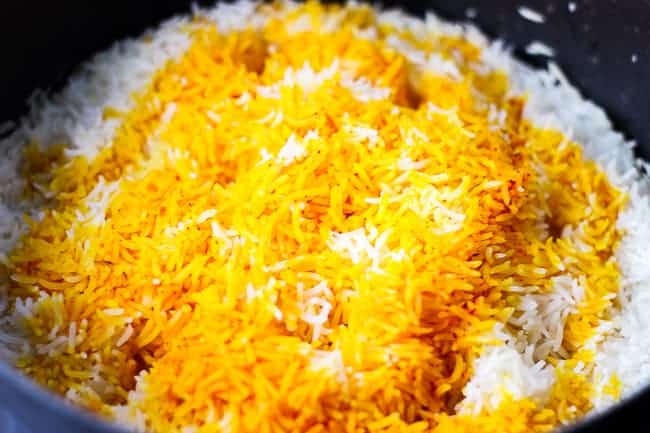
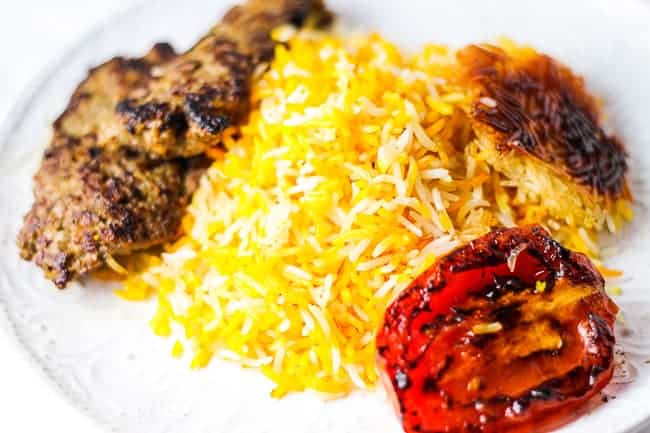
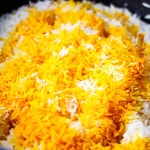
Chelow = Amazing Persian rice topped with saffron. Cooking basmati rice the Persian way is quite different than making “regular” rice the “regular” way. And it’s only just a gazillion bajillion times better. So, you choose. Recipe is below, my friends!
Kabob = Fire-grilled/barbequed meat---typically, the meat is placed on long metal skewers over a barbeque.
I can’t count the number of times I’ve had to explain to my non-Persian friends that’d come over to play with me when I was a little girl that those very long, sharp metal things were not skinny swords, rather skewers around which my mom or dad would wrap ground beef/lamb or use to impale chunks of filet mignon or chicken.
Yeah. It’s one of those things 1st generation Persian-American kids deal with, amongst a bunch of other things such as always being the hairiest one in class. Oh yeah, hairier than most boys too. Well how in the world do you think we get such awesomely thick hair and eyebrows?
You can’t pick and choose! You can’t!
So if you haven’t clicked out of the tab in complete disgust yet (I don’t know why I always have to lead you there), I think I’ll get back to the right way to eat chelow kabob, whether it’s at someone’s house, a restaurant, or your own house!
Take some chelow (rice), some kabob (meat), and some charred tomato and put it on a big plate---Notice the small plate in the pictures; but we'll get back to that later.
Now take a pad of good ol’ butter, put it on top of your rice and fold it into the rice. Honestly, it’s necessary guys. Don’t be scurd.
Then take some raw white onion and (oh my goodness you’re getting real scurd now, I just know it) put it on the side of your plate. Now here’s the kicker. With your food, you’re actually going to take a piece of the onion and take a small bite out of it, or a big bite if you’re awesome like that.
Eating it with your chelow kabob really helps digest such a hearty meal and it gives some nice crunch and heat too! I won’t ever be without raw onion when I’m having some chelow kabob.
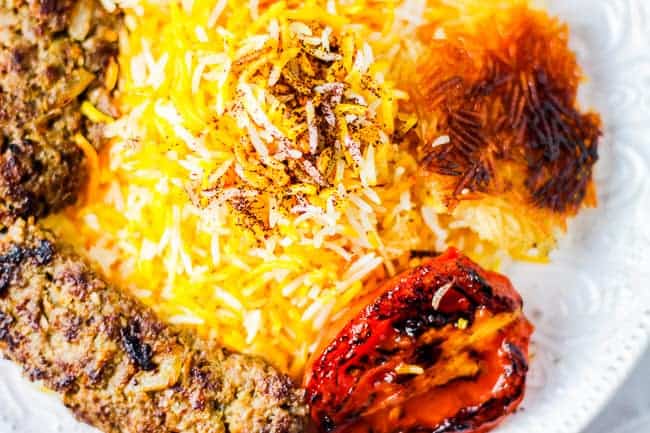
And don’t forget a pinch or two of sumac right on top of your rice and kabob. Sumac is deliciously tangy and is made from deep red colored berries that are dried and pulverized into a fine powder.
They're historically a very therapeutic fruit and just by looking at sumac, you can see it's chock-full of antioxidants.
Oh! And I like to add salt to my tomato too. MmmmK?
Well, I succeeded in making that sound horribly complicated! It’s so not complicated though. And I was really trying to simplify it as much as possible too!
It’s just that chelow kabob is not meant to be minimal. Not complicated, but also, so not minimal.
Actually it’s so freaking maximal! That’s why we like to eat it on special occasions or when we’re really craving it. It’s a whole thing, you see.
And if you want to go all out, don’t forget the shallot yogurt dip (the recipe for that will probably be up later this week). It’s a nice and refreshing side dish to really balance out this meal.
The thing is though, sometimes you don’t have the energy to do this whole thing and make a show out of it. Sometimes you come home after work and you feel like taking shortcuts in the kitchen without compromising flavor or health.
And if you’re like me and certain people (*ahem* freaking building management) won’t allow you to have a real grill outside because they’re scared you’ll burn their building down, so out of desperation you buy an electric grill only to soon throw away your electric grill because IT’S NOT A GRILL, then maybe you figure out how to make chelow kabob on the stove.
So in that case then, we call this kind of chelow kabob, chelow kabob deegi. Deeg means stove-pan in Farsi. So essentially, this is chelow kabob prepared inside and on the stove! And there’s no fussing with fancy skewers either.
It’s so simple to prepare. And since this is a stovetop version of the traditional way to prepare this dish, I thought to play on that a bit by using a cutesy---and so not in traditional chelow kabob fashion---itty bitty plate.
Itty bitty is all relative in this case.

I grew up eating this simplified, yet still just as tasty, version of chelow kabob on random weeknights when we had some ground beef in the fridge, some onion, tomato, and rice.
See? It’s made of ingredients you probably already have at home (for my Christmas gift, maybe tell me that you always have basmati rice on hand) and it’s actually really easy to make. But I do repeat, it’s HUGE on flavor.
Go for it! And if you do, please tell me how it went and how much you lurved it.
Noushejaan (nourishment for your soul)!
Recipe
Stovetop Beef Kabob and Basmati Rice (Chelow Kabob Deegi)
Ingredients
FOR THE RICE:
- 2 tablespoon ghee + enough ghee to also coat the bottom of your large pot
- 4 cups dry basmati rice
- ½ teaspoon ground saffron mixed into ¼ cup hot water
FOR THE KABOB:
- 1.5 lb ground beef
- 2 white onions 1 is pureed or finely grated, and 1 is cut into thick wedges
- 1 ½ teaspoon sea salt
- 1 teaspoon black pepper
- ½ teaspoon turmeric powder optional
- 3 tablespoon ghee
- 4 ripe roma tomatoes sliced in half lengthwise (any tomato variety you like is perfectly fine to use)
- 2 pinches of sumac to top each plate of food
- butter (optional but highly, highly recommend) to fold into the rice on your individual plate
Instructions
FOR THE RICE:
- Boil water in a large pot and add plenty of salt (just as you would if you were cooking pasta) and 4 cups rinsed rice. Put stove on med-high heat. Don’t let it over-boil. When the rice is just hard in the middle and soft on the outside (al dente rice!), turn off the burner and drain the rice into a colander.
- Add ghee to the large pot to cover the bottom of it and put on med heat. Add the rice to the pot, poke some holes with the back of a spatula almost to the bottom of the pot to release steam, and cover.
- When steam rises to the lid of the pot (this is easy to tell with a clear lid, otherwise wait about 5 minutes) remove the lid and add dollops (approximately 2 tbsp) of ghee along with the saffron-water mixture to the top of the rice. Replace the lid with a large folded napkin or kitchen towel placed directly and tightly underneath it to catch the steam.
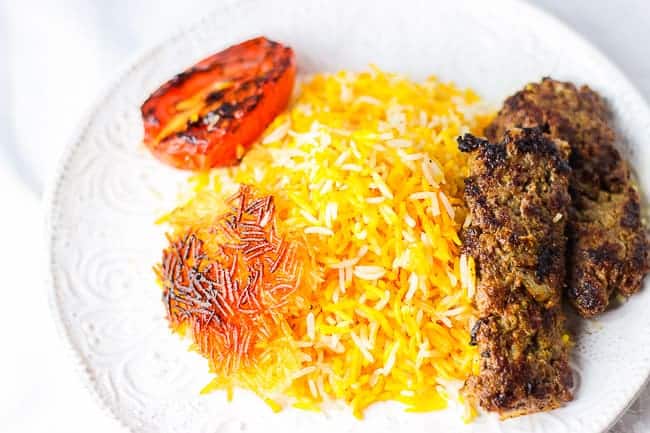
- After about 5 minutes, put on med-low heat for ~30 min or until the pot sizzles when you splash a couple drops of water on the side of it—whichever happens last. You can either carefully flip the rice over onto a serving platter so that you can see the beautifully crisp tahdig (crispy rice at the bottom of the pot) or just serve yourself directly out of the pot, but make sure to dig for some tahdig at the bottom! It’s a treat!
FOR THE KABOB:
- Combine beef, pureed onion, salt, pepper, and turmeric (optional).
- In a large nonstick pan over med-high heat, add a couple tablespoon ghee and swirl it around the pan.
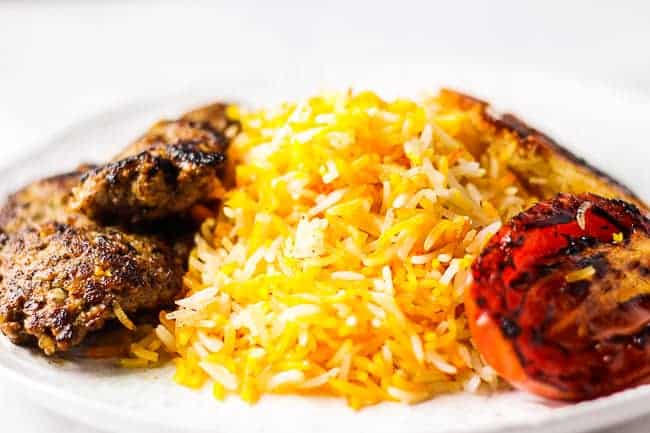
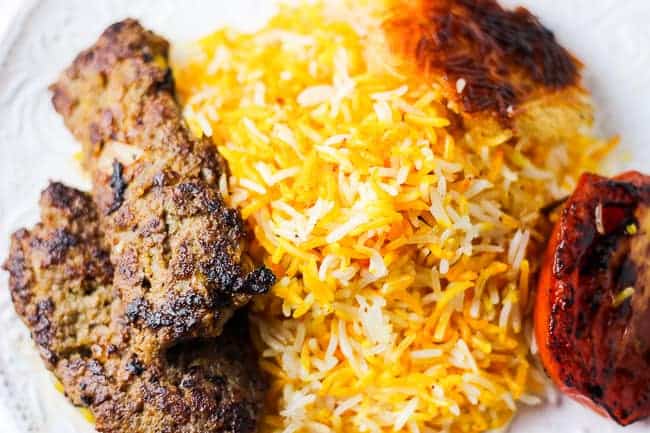
- Add the beef mixture and spread it out to form a flat ½ inch thick layer. Using your spatula, you can form the beef into long patties like I did in the pictures. Cook for about 2-3 minutes per side or until browned and cooked through. **ALTERNATIVELY, you can cook the flattened out beef mixture on med-low heat with the lid on and after about 3 minutes (when it’s cooked completely through), remove the lid and use your spatula to cut the beef into long patties and flip over to sear the other side without the lid. You can increase the heat a bit to get a better sear. This method keeps the oil from splattering much.**
- Once the beef is almost done, add a bit more ghee if needed, turn up to med-high heat, and place tomatoes (cut side down) onto the pan to sear for a couple minutes per side.
- Remove kabobs and tomatoes from heat and serve with the basmati rice.
- Persians always have sumac with this dish. You just throw in a pinch right on top of the food. For extra love, add a pad of butter to the rice on your plate and fold it in. Also, if you like this idea, put a wedge of onion on your plate and bite a piece of it with your food. It helps with digestion and it gives a nice crunch and a bit of heat. It’s Persian food so you might as well do it the Persian way, right? Shallot yogurt is also commonly an accompaniment for this dish and that is photographed alongside the dish above. Stay tuned for that super simple recipe next! Noushe-jaan (nourishment for your soul)!


ahu @ ahueats says
Gimme gimme gimme! This looks amazing... and those tomatoes, just luscious!
honestandtasty says
Thanks Ahu! It is such a YUM and easy meal to make. I wish I had some right now too and I'd teleport it over to you right away!
xx
CheloKabobLover says
This is my second favorite dish, after lasagna. (Pizza, tamales, enchiladas,and fazolis follow closely behind)
My former girlfriend escaped the revolution on the back of a donkey into Turkey. She taught me how to make this dish in 1982, and it has been a staple ever since. I cook the rice with the tomato and the yogurt, though, per her recipe. The sumagh, with the limon Omani, add just the right tanginess. I dice the raw onion into the served rice so that every forkful gets some.
The Kebab is ground beef, and garlic, rosemary, basilico, onion, potato, salt, pepper, and egg pureed. The aroma is mind-blowing once mixed - even more so once it is cooking! Neighbors have to be told that they must negotiate an invitation in order to partake.
honestandtasty says
Nice 🙂
bonnie yousefian says
Excited to have and try this recipe as our grill is currently covered by almost 3 feet of snow, we probably won't get to it before May. Thank you for all the wonderful things that you post.
honestandtasty says
Thank you so much for your sweet comment, Bonnie! I really appreciate that. 🙂
I hope you love this recipe and that it treats you well. I so wish I had a real grill (covered in snow or not!) so that I could have all that lovely summertime grilling to look forward to! Just dreaming about grilled peaches over some fresh vanilla ice-cream right now mmmmmm! And yep, I'm pretty sure it's 4ºF outside right now too. 😉
Warren says
Thank you! Now I see why some rice grains are perfectly white and others perfectly yellow. And the charred tomatoes with kebab are one of my best memories of Iran. But try as I may I cannot char those tomatoes on a stove in a pot or pan - any advice? Warren
honestandtasty says
Hi Warren! Thanks for commenting on this! So when you char the tomatoes, make sure your pan and oil are already very hot before placing the thick slices of tomato into the pan. Once they're in the pan, you should hear the searing action immediately---thanks to the hot pan and oil! Let them be for a couple minutes before touching them so that you can ensure a good sear. Then after about 2 minutes or so, flip them and sear for another minute. You should have good charred tomatoes from this 🙂
Happy Friday, Warren!
Amber says
Thank you for this recipe. My boyfriend is Persian and his father has made this so many times for me and it's delicious. Ive been trying to replicate his recipe but have never quite been able to. This is exactly what I need to make this recipe for my boyfriend. Thank you!
honestandtasty says
That's such a sweet little story, Amber 🙂 I hope you can make this for your boyfriend and his dad as well! Good luck and can't wait to hear how you like it!
Samantha says
Thanks so much for posting this! I tried Persian food for the first time a couple years ago and this was the dish I had first. I LOVED it! I'm so excited to try making it myself for dinner tonight 🙂
honestandtasty says
Awesome, awesome, awesome! I hope you loved this recipe!!
Aika Yamaguchi says
Tried this recipe out! The taste is excellent! Thanks for the recipe! xo
honestandtasty says
First of all, I'm glad it tasted great! I'm sorry about it falling apart, it definitely shouldn't be doing that! There could be a few reasons for this. 1. If your meat was perhaps a little too lean then there wouldn't be enough fat that acts as a glue to keep the beef together. 2. Make sure you fully combine the meat mixture. This can keep it from crumbling as well later as it cooks. 3. The beef should be either patted down in a thin, even layer in the pan, allowed to cook and then gently cut into pieces once cooked and flipped to cook the other side, or it should be formed into nice patties like in the pictures ahead of time and gently flipped to cook the other side. Both ways work great. Hope that helps, Aika! Let me know! 🙂
Barbara Morado says
OMG!! My boyfriend cooked this dish for me today and I fell in love with it. Who's I could show y'all a picture, but I can't 🙂
I love when he cooks for me!!
Barbara Morado says
Oops I meant to say wish lol
honestandtasty says
That's so sweet! Good for him! Love that you loved it! 😀 x
Benjamin says
Wow, just wow... I love this recipe, cant stop eating.. 😅 thank you so much for this wonderful recipe